Login/Signup
Connect your Roo Code extension to Roo Code Cloud to sync your prompts, access online task history, and enable sharing and collaboration features.
Getting Started
To connect to Roo Code Cloud, click the cloud icon in the top right corner of the Roo Code plugin.
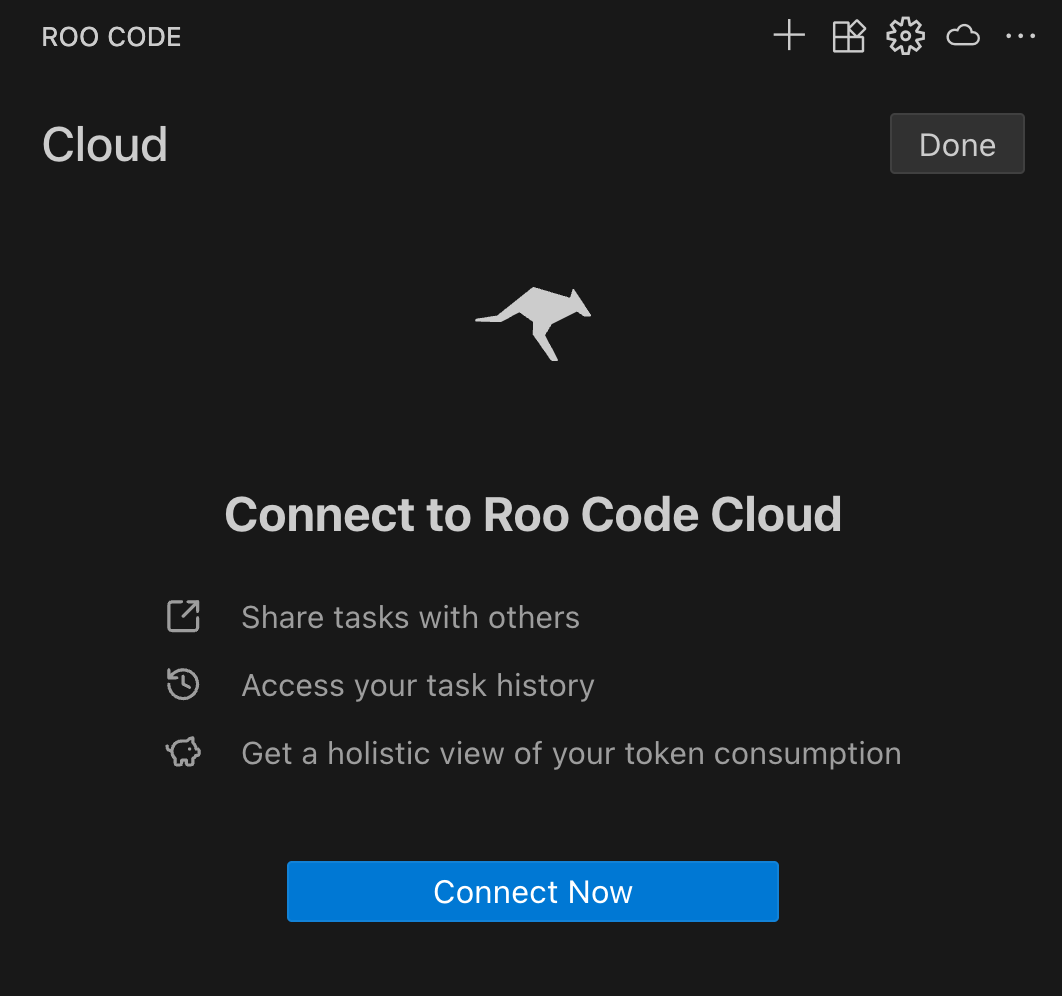
Click the Connect button to begin the authentication process. You'll be redirected to the Roo Code Cloud website.
Sign In Options
You'll see the sign-in page with multiple authentication options:
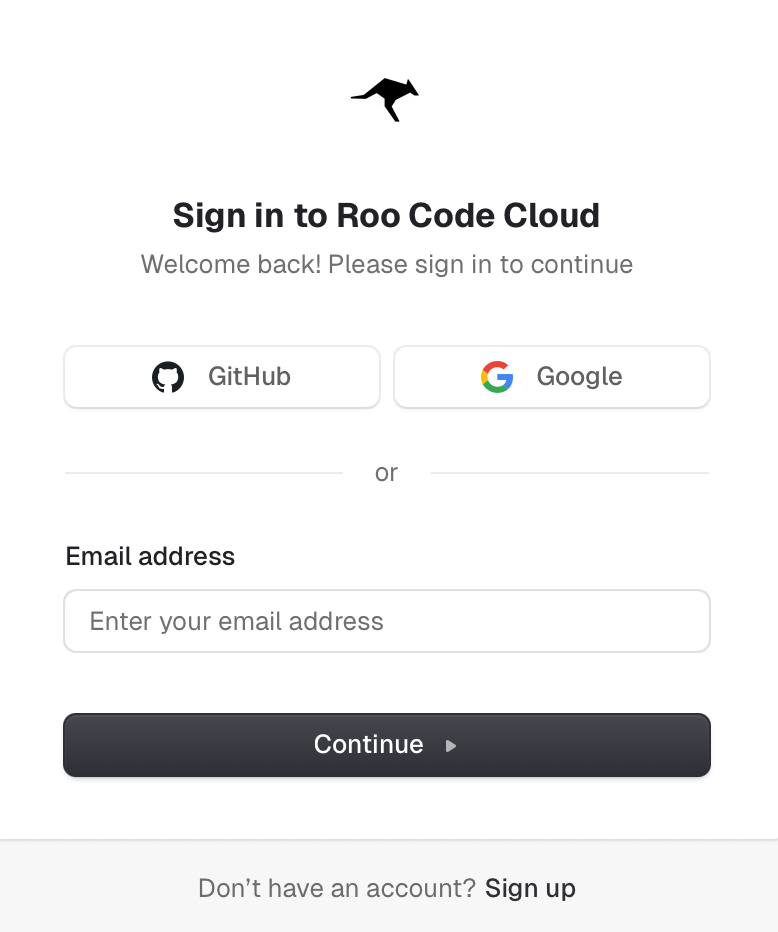
Choose your preferred login method:
- GitHub - Sign in with your existing GitHub account
- Google - Sign in with your existing Google account
- Email - Enter your email address to continue with email authentication
Creating a New Account
If you don't have an account yet, you have two options to create one:
Option 1: Sign Up with GitHub or Google
The quickest way to create an account is using your existing GitHub or Google account:
- From the sign-in page, click either the GitHub or Google button
- You'll be redirected to authenticate with your chosen provider
- After successful authentication, you'll see the Terms of Service and Privacy Policy agreement form:
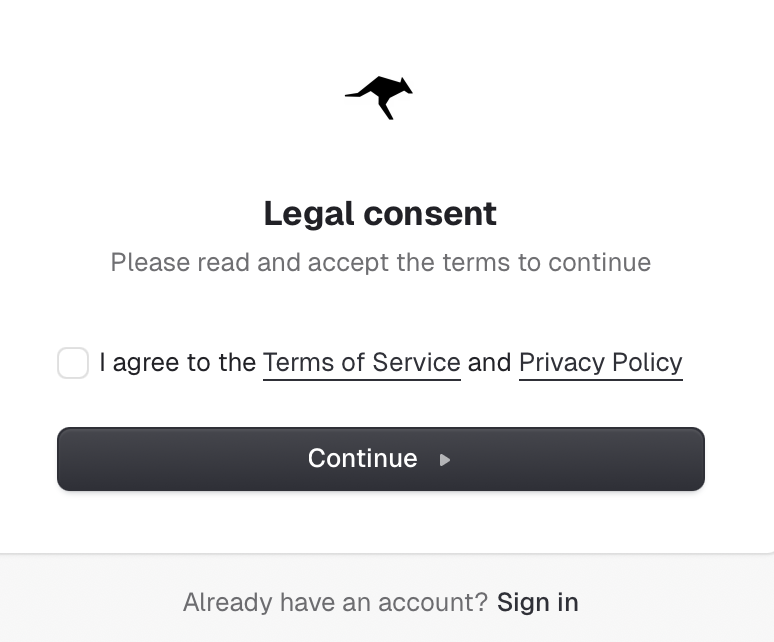
- Review the Terms of Service and Privacy Policy
- Check the agreement box to accept the terms
- Click Continue to complete your account creation
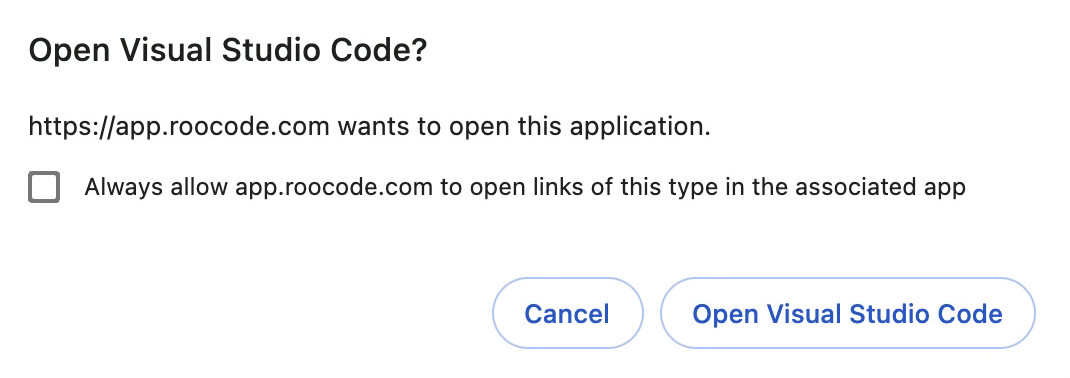
- After account creation:
- If connecting from VS Code: You'll see a confirmation popup (proceed to IDE Selection section below)
- If signing up directly at app.roocode.com: You'll be redirected to your dashboard:
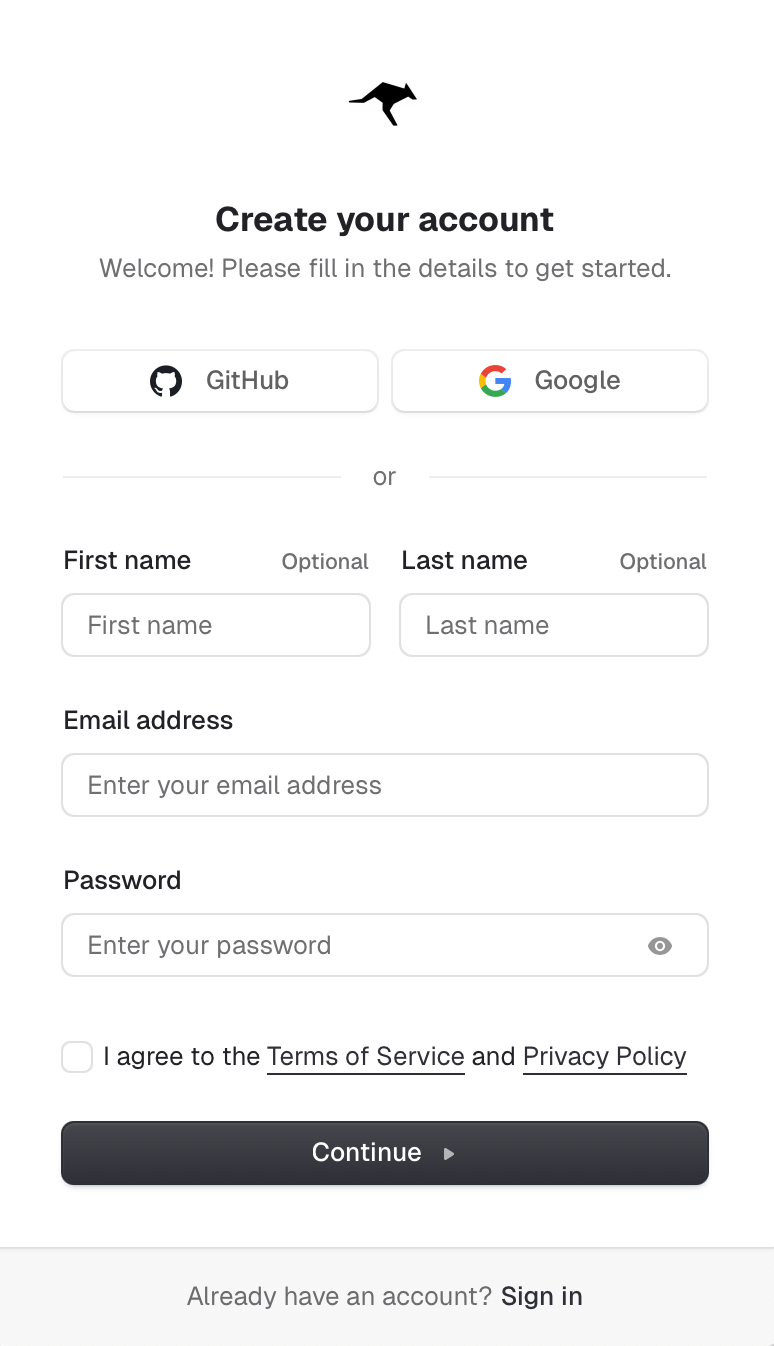
Option 2: Sign Up with Email
Alternatively, create an account using your email address:
- Click the Sign up link at the bottom of the sign-in page
-
Complete the signup form with:
- First name (optional)
- Last name (optional)
- Email address (required)
- Password (required)
-
Review the Terms of Service and Privacy Policy
-
Check the agreement box to accept the terms
-
Click the signup button to create your account
-
After account creation:
- If connecting from VS Code: You'll see this confirmation popup:
- If signing up directly at app.roocode.com: You'll be redirected to your dashboard:
IDE Selection
The authentication page includes a selector for other VS Code-compatible IDEs:
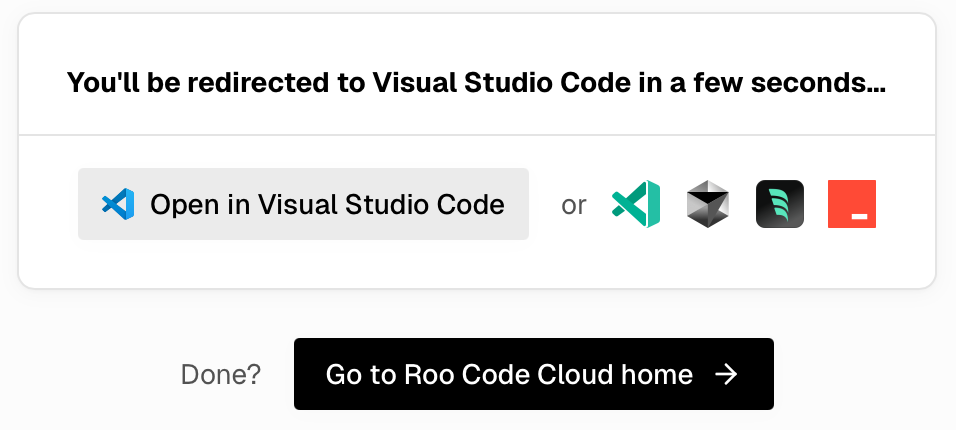
This allows you to connect Roo Code Cloud to various VS Code forks and compatible editors.
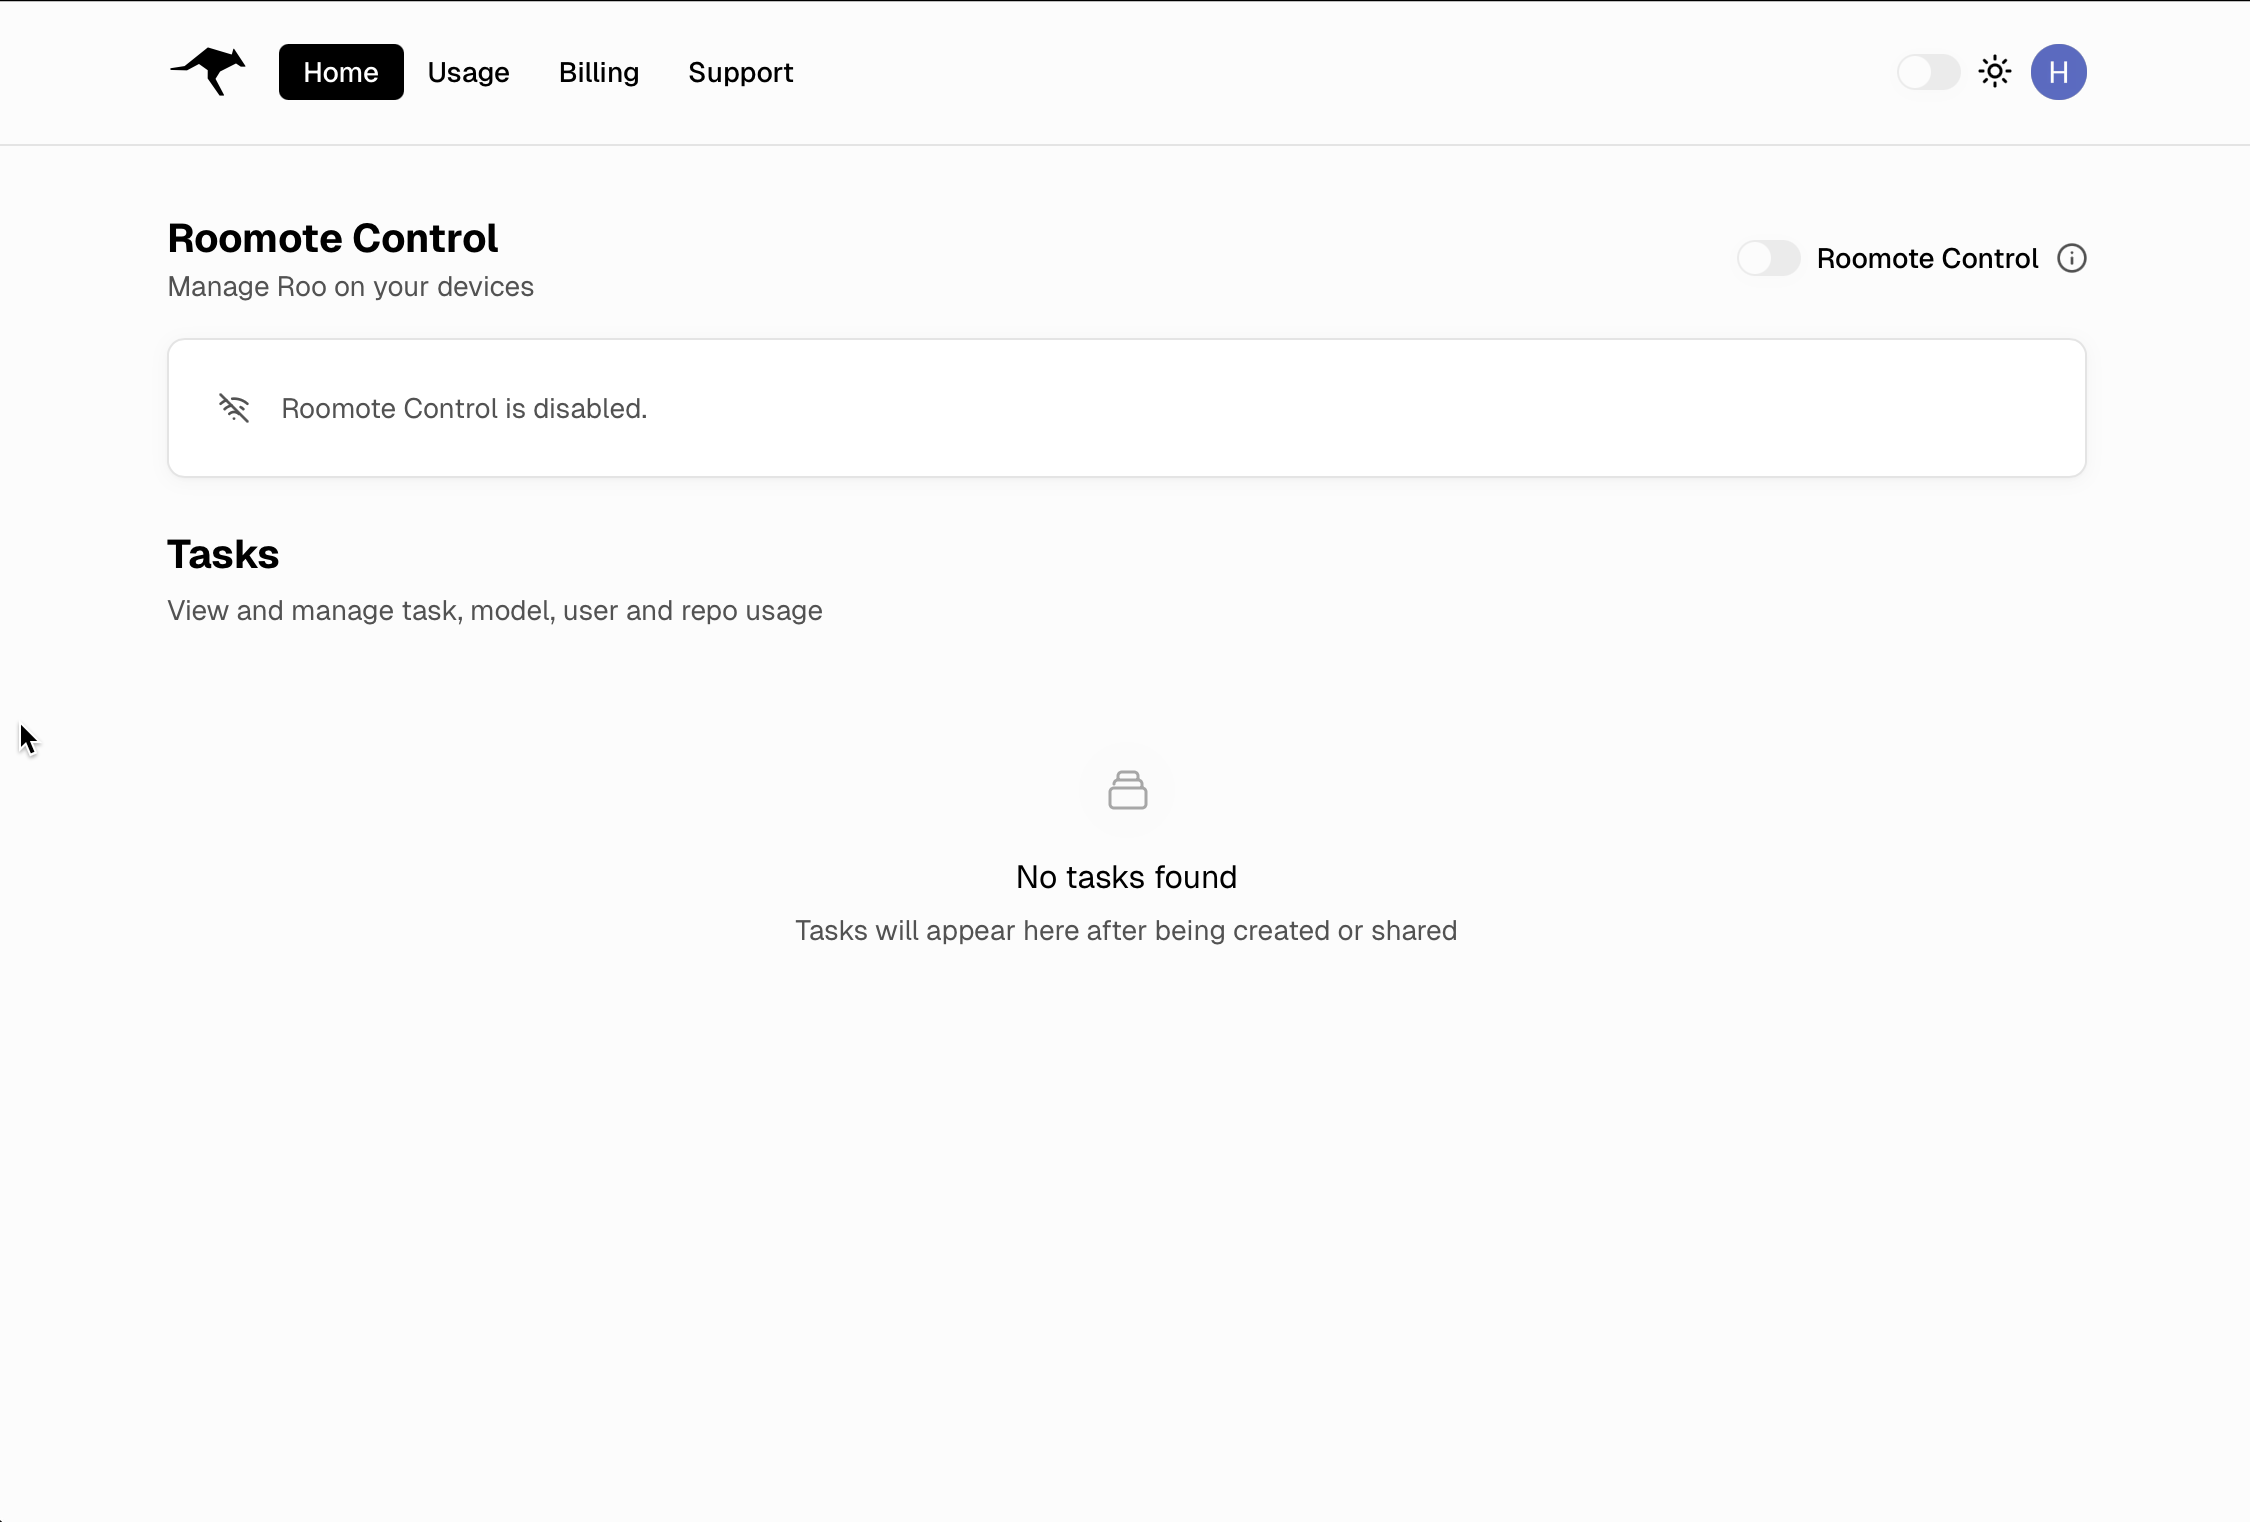
Authentication Complete
Once authenticated, you'll be redirected back to your IDE where you'll see your connected account:
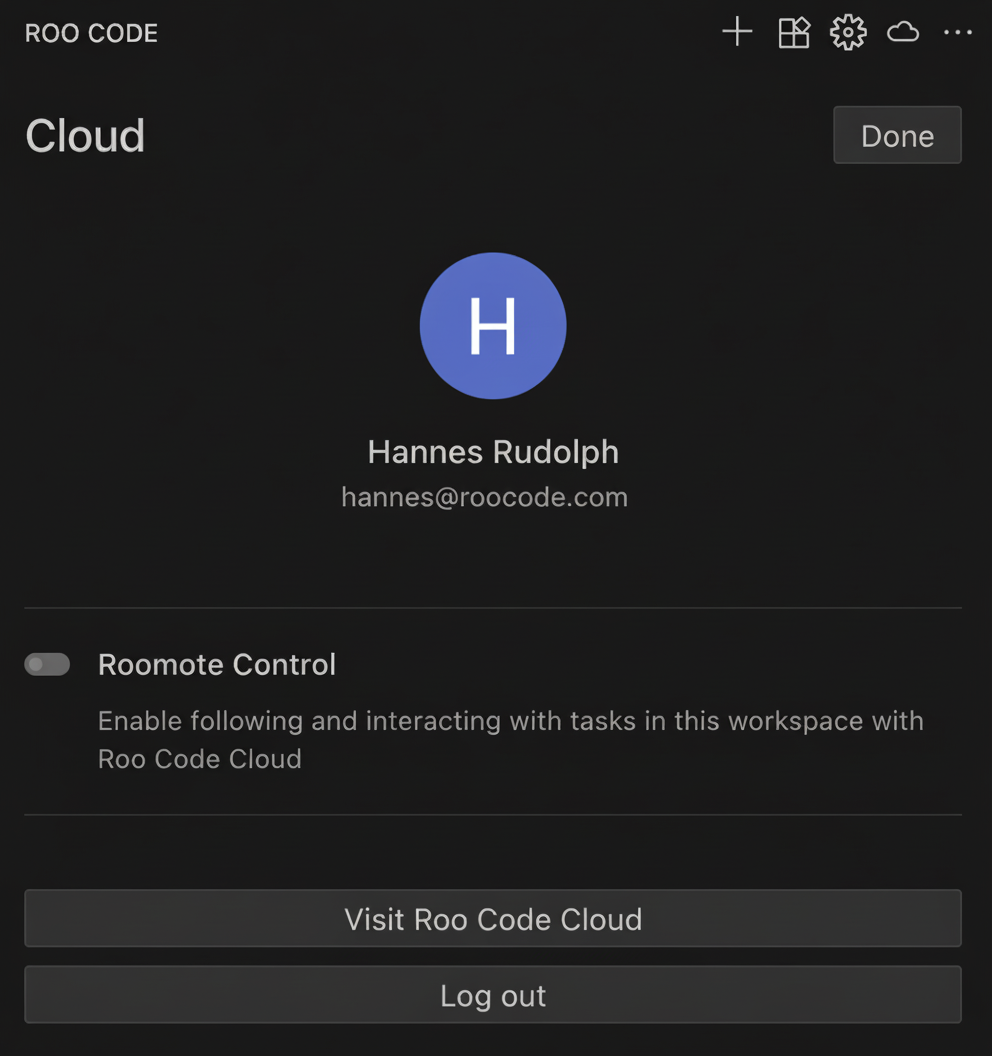
This screen displays:
- Your profile avatar and full name
- Your connected account email address
- Roomote Control toggle - Enable following and interacting with tasks in this workspace with Roo Code Cloud
- Visit Roo Code Cloud button - Opens the web dashboard in your browser
- Log out button - Disconnects your account from this IDE
- Done button (top right) - Closes the Cloud panel and returns to normal Roo Code usage
Your Roo Code extension is now connected to Roo Code Cloud and ready to sync your data and enable collaboration features.
Authentication Security
Roo Code Cloud uses industry-standard OAuth with GitHub and Google, plus traditional email authentication to ensure secure access to your account:
- OAuth 2.0 Protocol - Secure authentication through trusted providers (GitHub and Google)
- No Password Storage - When using OAuth, Roo Code never stores your GitHub or Google passwords
- Encrypted Connections - All authentication requests use HTTPS encryption
- Token-Based Access - Secure tokens manage your session without exposing credentials
- Email Authentication - Traditional email/password option with secure password hashing